How to control a combat robot via mobile phone
Turning a smartphone into a remote control for a combat robot is an increasingly popular solution that is gaining popularity among DIY enthusiasts and in some competitions. The main advantage is flexibility and the use of a device that almost everyone has with them. The entire process of connecting a phone to a robot is based on three pillars: the robot’s hardware, the software application on the phone, and the method of communication between them.
How it works
The basic principle is to replace the classic lever RC controller with a mobile app. The app on the phone generates control commands, which it sends wirelessly to a receiver module inside the robot. This module transmits the signals to the main control unit—the robot’s brain—which translates them into specific instructions for the drive motors and weapon systems.
What is needed for connection?
The entire solution consists of several parts that must work together.
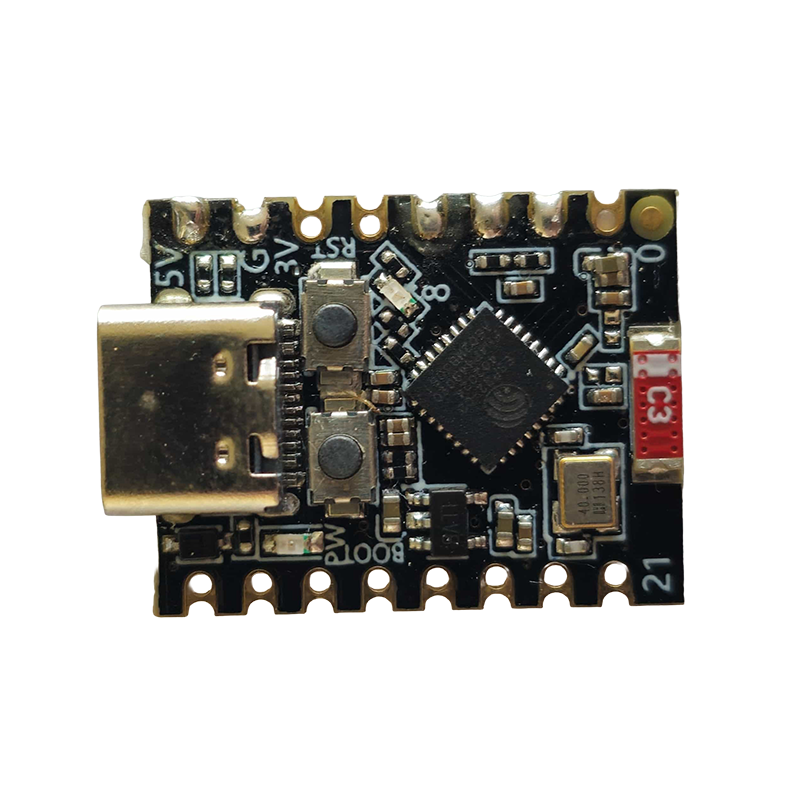
1. Microcontroller (ESP32/Arduino)
The heart of the robot is a microcontroller, most commonly in the form of an ESP32 or Arduino board. The ESP32-C3 model is a great choice due to its small dimensions and the ability to connect via both Bluetooth and Wi-Fi, or even via the ESP-NOW protocol.

2. Mobile phone applications
- Ready-made universal apps: There are many ready-made applications for both Android and iOS that serve to control robotic projects. Apps like Remote XY allow you to easily create your own control panel with buttons, sliders, or a virtual joystick.
- Creating your own app: For those who want full control over their interface, it is possible to program a custom application. Tools like MIT App Inventor allow you to build a functional Android app even without advanced programming knowledge.
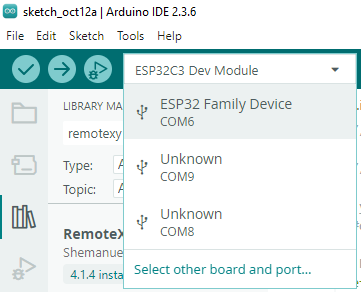
3. Program for the robot control unit
Creating programs for both ESP32 and Arduino boards is easiest in the Arduino IDE software, which uses the C++ programming language. In this environment, you create the code that can then be uploaded directly to your microcontroller.
If you use the Remote XY app as a controller, the app generates code that you simply paste into the Arduino IDE and add the logic for what should happen when you press the controls. Once the app is paired, the script on the microcontroller listens and waits for commands from the mobile application. Based on the received data, it controls the outputs (GPIO pins) to which the motor driver is connected.
Advantages and disadvantages of this solution
Main advantages:
- Savings: You don’t need to buy a specialized and often expensive RC transmitter.
- Customizability: You can design the user interface in the app exactly to your liking.
- Advanced features: You can use phone sensors such as the accelerometer for tilt control.
Main disadvantages:
- Response: A touchscreen will never provide the same precise and rapid tactile response as the physical sticks of a classic controller.
- Signal interference: The reliability of wireless connections (Bluetooth, Wi-Fi) can be problematic in environments with a lot of interference, which is typical for competitive arenas.